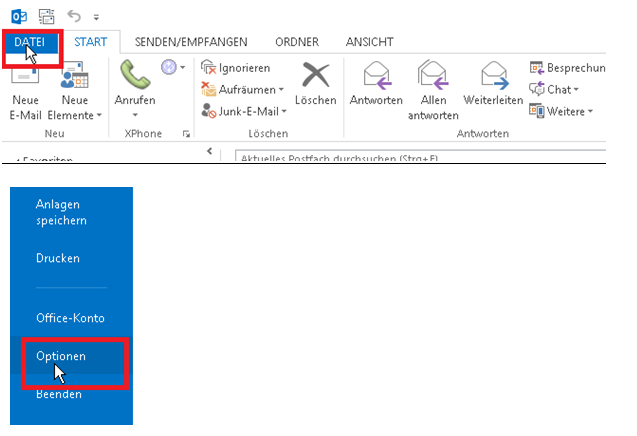
Open Outlook and select “Options” under “File”.
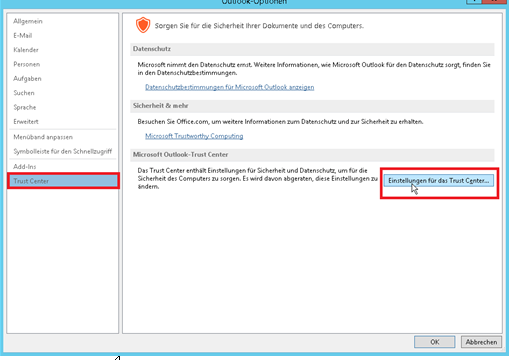
Now the Outlook Options window opens. There you select the “Trust Center” and click the “Trust Center Settings” button.
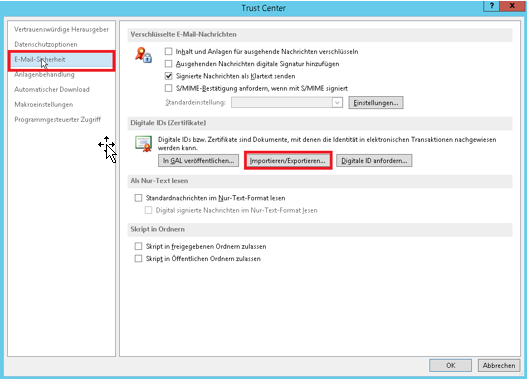
In the next window “Security Center” select “Email Security” on the left.
In the right section of the “Digital IDs (certificates)” area please select “Import/Export”, in the window that opens now go to “Browse”.
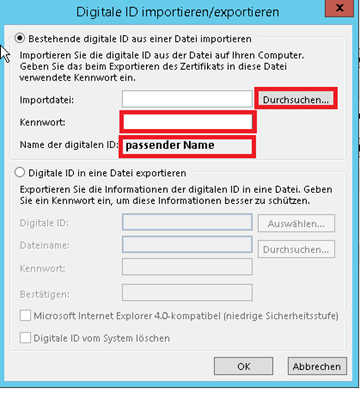
Please select the correct certificate and confirm with “OK”. Now you will be taken back to the “Import/Export Digital ID” view, where please enter the password you assigned during the export process from Firefox. Then give the S/MIME certificate a name and confirm with “OK”.
Now your certificate has been imported into Outlook and you can select it under “Encrypted e-mail messages” via the “Set settings” button for the e-mail address.
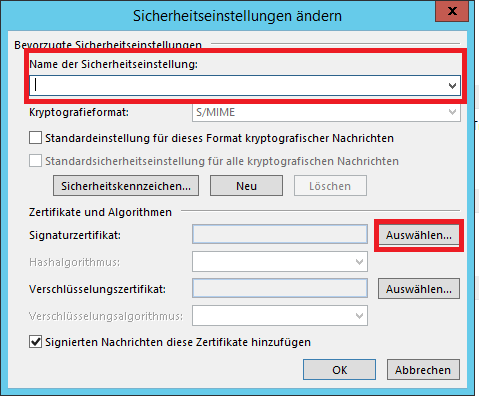
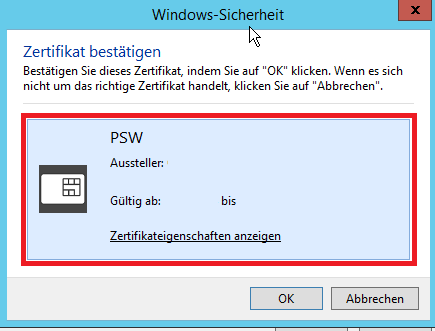
Now you should see the certificate that you have just installed under “Signing certificate” and “Encryption certificate”. If this is not the case, you still have to select the certificate via the “Select” button.
Please enter a suitable name (e.g. your e-mail address) under “Name of the security setting” and confirm the window with “OK”.
Optional setting
Under “Encrypted e-mail messages”, activate the item “Add digital signature to outgoing messages” and confirm with “OK”. From now on, your certificate will sign all your e-mails.
